Create a Network: Add a Location
When creating a Network at times only a few locations may be needed. In these cases it is easier to add single locations than to upload multiple locations at once.
Creating a Location - Step by Step


In creating a location, start in the home screen. To do this, click HOME in the top menu bar.
Select “Create New Network” in the Home Screen Menu and fill in the Pop up with the Network name and the preferred folder.
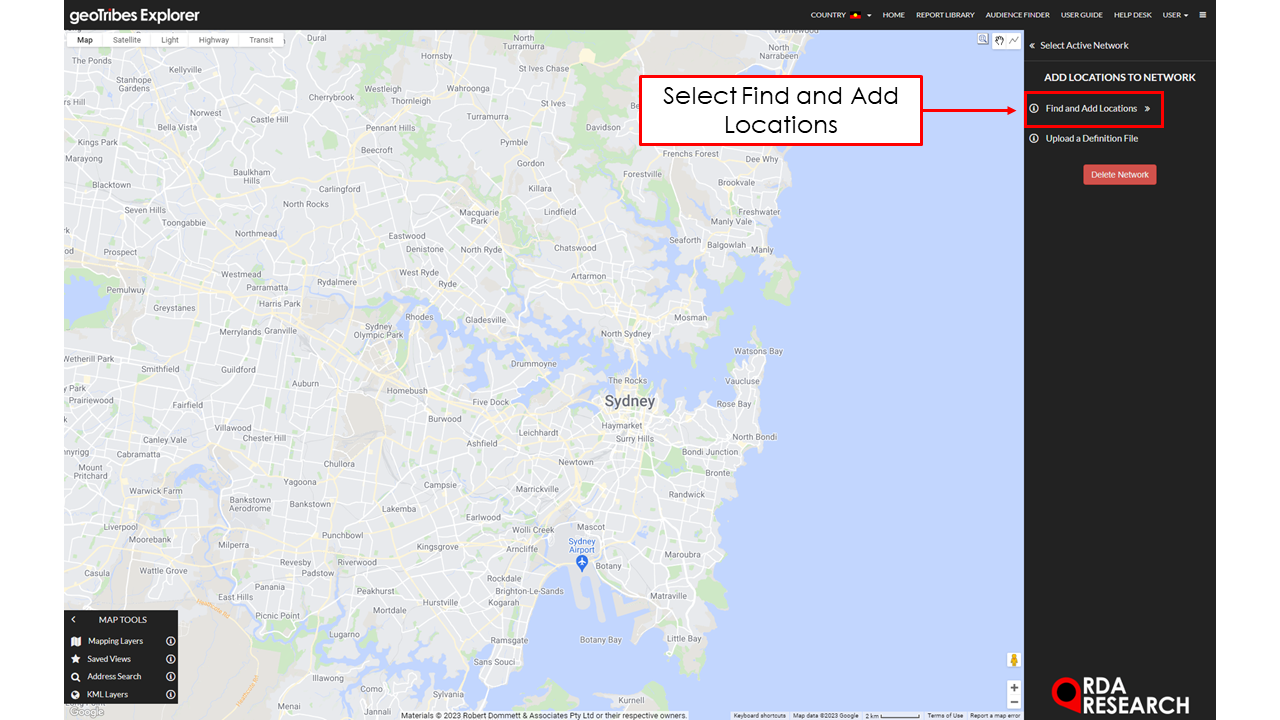
Select “Find and Add Locations” , this will give users a display that enables descriptions and characteristics about the location.
Option Selection: Select “Add New Location”
Point Placement: Select 'Drop / Redrop Pin' and click on the preferred spot on the map, alternatively type the address into “Address Search” under “MAP TOOLS” and hit enter.
Location Name: Name the location.
Trade Areas: Select out of Radius, Travel Time and Custom
Radius: Draws a radial distance from the location.
Travel Time: Provides a time limit, this will calculate the amount of distance possible to travel in the time given.
Custom: Customise the preferred area - Learn more here
Tags: Optional - Enter any Tags to associate with the Location, entering ',' (comma) to submit. E.g. Open Store,
Location Attributes: Optional - Enter any Location Attributes to associate with the Location, e.g. Postcode of Location, Location Identifiers and other location metadata. Read more here on location attributes.
Select “Save Location”
Need to upload a large number of Locations?
