Custom Trade Areas
Custom Trade Areas allow users to manually select which Census Areas are assigned to a location via visually selecting them on the Map. The mapped Census areas can be selected individually by clicking on them, or in bulk by drawing an enclosing boundary with the Marquee Tool. Passive Networks, KML and Mapping Layers can be visible on the Map during this process if necessary to help outline where to draw the Trade Area.
Network Locations
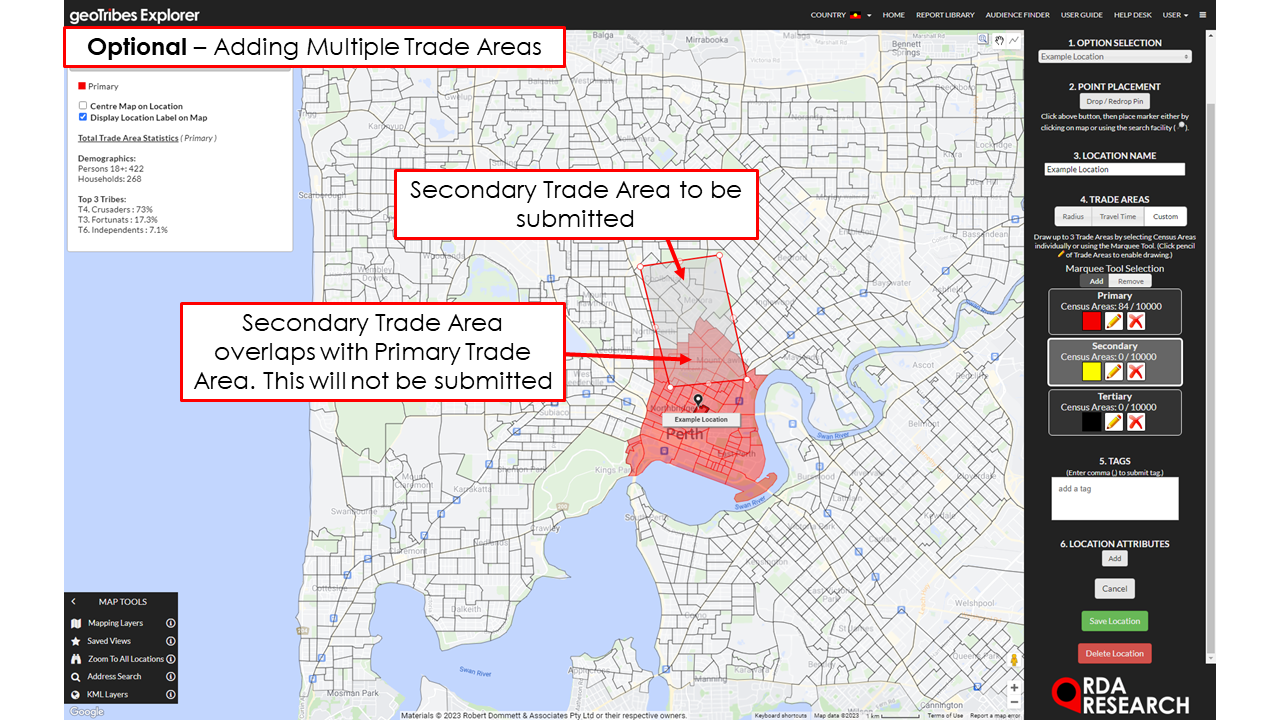
Within the 'Add / Edit Network Location' Menu users can draw Primary, Secondary and Tertiary Trade Areas.


To add Census Areas to a location:
From the Network Menu, select 'Edit Network' and 'Add / Edit Network Location'.
Create a new, or select an existing Location.
Within '3. Trade Areas' select 'Custom', which will load the Census Areas on the Map.
Click on the 'pencil' icon in the Trade Area type, begin selecting:
Individual Census Areas: Click on a Census Area to assign it to the Trade Area, and again to remove it.
Multiple Census Areas: Use the Marquee Tool to draw an enclosing boundary, adding or removing Census Areas depending on the 'Marquee Tool Selection' option highlighted in the Menu. Click the Marquee Tool icon in the top middle of the Mapping window, then click on the Map to begin drawing the enclosing boundary. Click around the desired area to draw a polygon, and double-click or click on the original enclosing boundary to finish. This will convert the drawn boundary to a Census Area selection which is assigned to the current selected Trade Area.
Save changes.
